
Getting Ready, Sewing for Fitting, Cups
Once you have your pieces cut out, you are *almost* ready to begin sewing.
Before you begin, make sure you have the proper needle in your machine - one that will be able to sew stretch fabrics. This type of needle is different for every machine, but generally a stretch needle is the right one. You will be stitching a lot of elastic and stretch fabrics and the wrong needle will cause frustration every time. It is such a simple thing to fix, too!
The strange thing about bras is that unlike many other garments that can be fitted along the way, these garments can not. You just about have to have a completed garment before trying it on. Careful measurements help, but since every body is unique, you may have to adjust along the way. What I suggest doing, is doing what we do in regular garment sewing: baste! You can machine baste with a longer stitch before committing to permanently sewing the pieces together. You can also attach the elastics with a wide and long zigzag before making a commitment. It will be much easier to remove the stitching and adjust something rather than picking out little bitty stitches. Trust me, I've picked apart quite a few bras and it's no fun. As we progress, I'll show you both ways of stitching.
Cups:
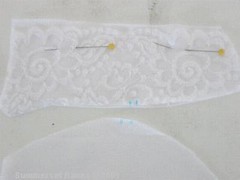
To begin assembly, you will need to consider the top edge finish. If you are just using stretch lace for the upper cup, then you have no finishing to do. If you are using the stretch lace over another fabric, you will need to attach the two fabrics together. You can see the lace pinned in place below, and the notches marked in water soluble marking pen.
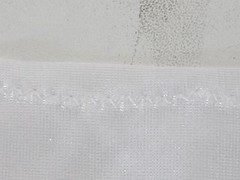
I use a small zigzag and stitch along the edge of the lace, following the curves.
 After stitching, I trim away the excess fabric from behind the lace.
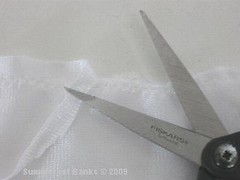
Now, matching the symbols and notches, stitch the lower and upper cups together. I like to line the bottom cups - this is why I cut out four of them - which also helps to hide the seam allowances and make the inside of the cups smooth. To do so, I place the upper and lower cups right sides together and then place the remaining lower cup piece face down, right sides together *with the other lower cup*.
 Don't be afraid to use a lot of pins. These fabrics can be slippery and your seam allowance is only 1/4". Make sure everything is lined up properly.
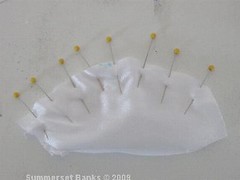 I stitch my seams with a 2.6 stitch length for a permanent seam. If you're basting, use something larger, like 4.0 length. This is big enough to be easily removed, but small enough to hold the pieces together properly. Once the seam is stitched, the cups can be opened and pressed.
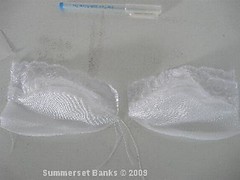
The cups are now ready for the next step: the bridge/bottom band. That's the next tutorial.
Thanks so much for this great tutorial! After two fitting samples, I have made my own copy of this bra that I really love, but I'm having a bit of an odd problem with it. When I try the bra on, the seam across the cup wrinkles. It's not wrinkled laying flat, and it's not the typical wrinkles from a cup that is too large, but instead it looks like the seam is wrinkling as it tries to stretch. I am using stretch satin, with fusible interfacing on the bottom cup and making a 34D. Do you happen to know how I can fix this? THANK YOU!!
ReplyDeleteSorry I didn't get back to you sooner! I didn't see that I had comment moderation on. Anyway, you can always privately email me, too. The link is on the left.
ReplyDeleteLet's see. Is your fusible interfacing a stretch interfacing? It could be that the satin is trying to stretch, but the interfacing is not allowing it to stretch, hence the wrinkles. Other than that, top stitching the seam might help, too. I don't prefer that seam treatment, but it may help control the seam allowances and keep everything smooth.