
Elastics and Channeling
Actually, it is: elastic, channeling, elastic, in that order. You attach the bottom elastic, then the channeling, and then the top elastic.
The bottom elastic is the first elastic to be sewn in place. This elastic is usually the wider elastic, although some of the smaller sizes can use the 3/8". Otherwise, this elastic is 1/2" or wider. The application of this elastic is important in the proper fit because if the whole thing is not tight enough, there will not be the right support in the final product. Follow the directions in your pattern carefully!
Since I'm making the band with the seam under the cup, I'll be showing those instructions. Measure the bottom edge and then calculate 80% of that number. That is amount of elastic you'll need. Once you've cut that amount, fold it in half and mark the center.
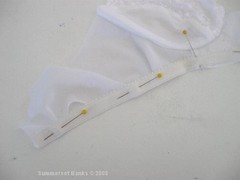
Pin the center of the elastic to the center of the bridge and then pin from the center to the band seam on either side *without* stretching the elastic. Place the elastic with the plush side up on the right side of the fabric and the smooth edge with no picots aligned to the raw edge of the fabric. It is easy for me to remember: smooth edge to smooth edge.

Then pin from the seam to the end of the band. You will have to stretch the elastic to fit. The simplest way is to mark the remaining ends of elastic at the halfway point and the remaining band at the half way point and pin those.
The elastic will be stitched in place with two seams. If you are basting for a try on, use a long straight stitch for the first pass and a very wide zigzag for the second pass. If you're permanently sewing the elastic in place, use a small zigzag and stitch close to the picot (or looped) edge. Make sure that the needle is just on the edge of elastic when it swings to the left. I use a zigzag setting of 2.0 for width and length. Be careful to only stretch the elastic, but not the fashion fabric when sewing. It is very easy to do so, because the band is stretch, too!
Turn the elastic to the inside along the zigzag stitching and then stitch again using a zigzag stitch or multi-step zigzag close to the smooth edge of the elastic like you did on the first pass.
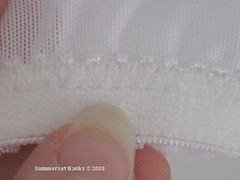
This is what the elastic will look liked from the inside when completely finished:
 The seam elastic, as seen from the outside:
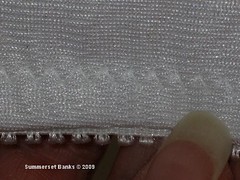
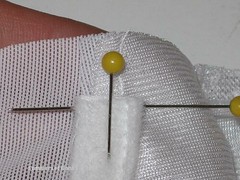
Now the bra is ready for channeling. The channeling is applied to the seam that joins the cups to the band. Working from the *cup* side of the seam, pin the channeling in place, with the seam on the channeling lining up with the seam joining the cups and band. It is fine to have excess at the top of the bridge - this can be trimmed away later. Leave 1/2" of space at the underarm edge. You will be applying elastic to that edge and it is easier to turn and stitch if you do not have to stitch through elastic and a double layer of channeling.
 Stitch right along the stitching line of the channeling to attach the one side to the seam allowance. If you're stitching for a try-on, just use a long basting stitch for both sides of the channeling.
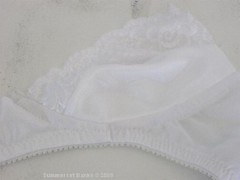
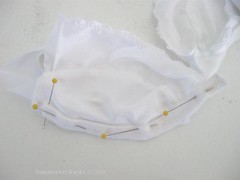 Turn the channeling and the seam toward the band, covering up the cup/band seam allowance. Now, top stitch the other edge of the channeling in place. Here is what it looks like from the inside and outside. Yes, you will be stitching over some of the band elastic. That's what you're supposed to do.
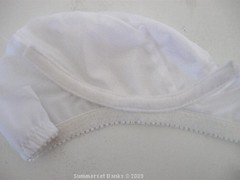
Now that the bottom elastic and channeling is in place, it is time to add the top elastic. This elastic is applied in the same way that bottom elastic is applied. Following the instructions, measure and cut the elastic (3/8" wide) to 80% of the length of the top edge measurement. Pin and sew as for the bottom elastic, except to leave 1/2" of elastic extra above the top edge of the lace. This will be part of the strap attachment.
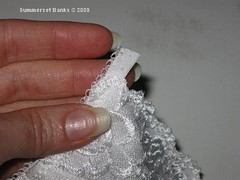
Do not worry if your elastic does not look perfect on your first try. This is a skill that will improve over time and with practice.
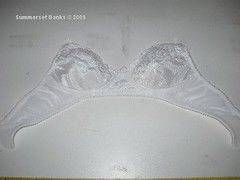
This is what we have so far, almost done!
The next and final tutorial will be straps and finishing.
No comments:
Post a Comment