
Bridge and Band
Once the cups are completed the next steps are to prepare the bridge and band and then attach the cups.
The bridge itself does not need to stretch, so even though it is cut in the direction of least stretch, it still benefits from being interfaced with a non-stretch interfacing. Once interfaced and marked, the bridge is ready to be attached to both of the sides bands.
First the bridge pieces are placed right sides together. The band pieces are then sandwiched in between the bridge layers at the sides, just like how the cups were made. Like the cups, this will hide the seam allowances and make for a smoother inside.

The bridge pieces are then stitched together on both sides and along the top edge.
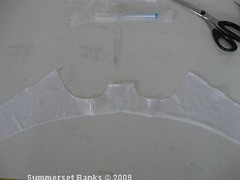
Once turned right side out, you will have the entire bridge/band unit:
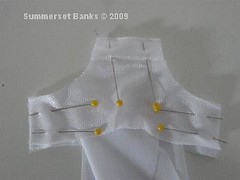
 Now the cups can be sewn to the band. Matching raw edges and notches, carefully pin the cups into place. The cup seam (between lace and solid) matches the notch closest to the center of the bridge. The bottom notch on the solid portion of the cup matches the notch on the band.
 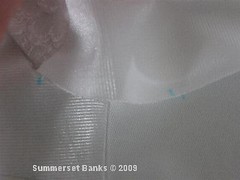 Since this is a very curved seam, take your time and use plenty of pins, then stitch.
 Once both cups are in, this is what you will have, which is now ready for elastics, channeling and finishing:
 Tomorrow's post: elastics and channeling!
No comments:
Post a Comment