
Straps and Finishing
This one is almost done, but there are three more things to finish before it is wearable: straps, wires and back closure.
Let's start with the wires. Insert the wires into the channels so that the white end of the wire is at the underarm and the end with the colored sparkles is at the center. In some cases, it will seem like the wire is a bit too long - do not worry, just shove it in. In the most careful way, of course. When you start to wear the final product the cups and channeling will stretch a bit and everything will fit just fine.
 Once the wires are in, bar tack across the ends of the channeling on the bridge to close the channels. If this is only for a try on - you don't have to close the channeling. It will be just one less thing to rip out if you need to.
The next thing to make is the straps. The straps must be put on before the closure in this style. You will need to assemble the straps first. This can be a bit tricky, but I hope this series of photos will help.
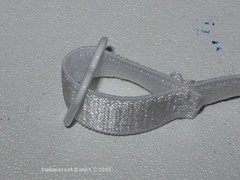
1. Thread the strapping through a slider leaving a tail about 3/4".

2. Stitch down the tail so that the slider can not come off.
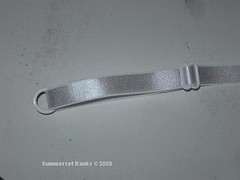
3. Thread the free end of the strap through a ring.
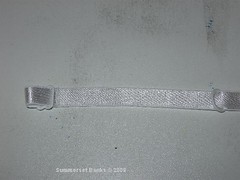
4. Bring the free end of the strap around to the left, toward the slider.
5. Thread the free end of the strap through the slider again and pull tight.

That's it, the strap is ready to be attached.
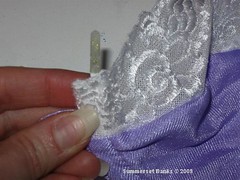
Take the ring and insert that little bit of elastic that you left at the top of the cup through it, bringing the elastic to the back.
 Bar tack the elastic in place. If this is only for a try on - just stitch across the elastic a few times, you can even leave the tails of the thread so you can find it and clip it out if necessary.
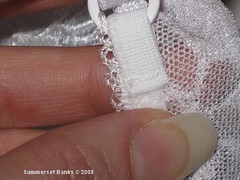
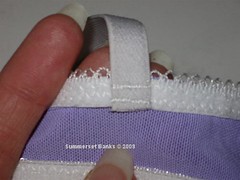
Bring the strap around to the back and bar tack in place at the marks indicated on the pattern. If you're making this for a try on, just stitch across the strap several times with a regular stitch length. This is strong enough for a try on, yet easier to rip out than a bar tack.
The final step is to add your closure. Check to see if the closure is the same width as the back. You might have to trim each section of the closure to fit. From the back, the hooks go on the section to your left. One end of the eyes opens up - just slip that over the raw edge of the back, with the fuzzy side (the side toward your body when wearing) down. The hooks go on the side to your right. Fold them in half, with the hooks facing down and attach like the eye section.

You can then either zigzag, satin stitch or baste it in place. If you're basting, use a regular stitch length. You don't want this coming loose during a try on.
You're done!

No comments:
Post a Comment