Monday, November 15, 2010

New Fall/Winter Colors

I noticed my stock of kits was way down and decided to get some new colors at the same time.  You can see all the new colors in the photo below.  There is a Twilight Blue, a deep blue that has a bit of teal to it rather than grey like Wedgewood Blue;  there is a Chocolate Brown (more on that below), a Charcoal Grey, Sangria, a really pretty deep wine color, and a Royal Blue, which is less bright than the photo and less bright than the 80's Electric Blue color.


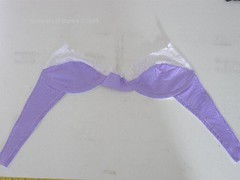
All of these colors would work nicely with white or beige for a two toned effect, as well as with the Pale Pink kit, currently on Etsy.  Here is the Chocolate Brown and Charcoal Grey with the Pale Pink lace:

All of these colors dyed up nicely for the most part.  The Chocolate Brown was a bit streaky and parts of the components dyed up a denim blue color.   I'm not sure if I want to dye up this color again.  It was a strange dye job, too.  The fabrics absorbed all of the purple dyes first, then they absorbed all the yellows to make a brown.  It was a little fascinating and a little worrisome to watch!

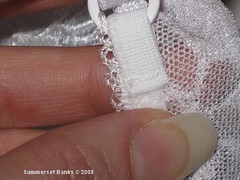
The Charcoal Grey had a bit of mottling, too.  Then I discovered a flaw in the lace.  There are some small holes half way between the scalloped borders that I didn't see until the lace was dyed.  I checked the other pieces and they're fine.  That's a little bit of a bummer because this lace is wider than my usual lace - almost 5" wide (see lace comparison photo below) and is part of a few kits with wider elastics. 


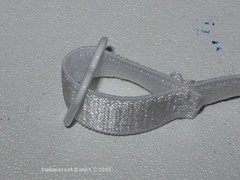
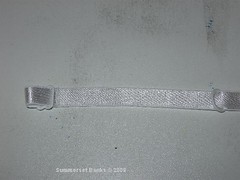
 The wider elastic kits (5/8" bottom finishing elastic and 3/4" straps, rings and sliders) available now are:  Charcoal Grey, Sangria and Twilight Blue.  Chocolate Brown and Royal Blue have the regular sized elastics (1/2" bottom finishing elastic and 1/2" straps, rings and sliders).  They are already in the Etsy shop with the Charcoal Grey and Choc. Brown being sold at a discount.

Tuesday, August 31, 2010

A Couple New Kits

I wanted to dye up a couple of kits in some deeper colors for the shop, so I chose a Deep Watermelon Red and a Deep Terracotta Rose.  Both kits have the patterned powernet, the last of the piece I had, and the red kit has the last piece of lace from NYC.  They both dyed up beautifully and will coordinate well with the current Soft Pink and Golden Vanilla Kits for mix and match fun.

Deep Watermelon Red:


Deep Terracotta Rose:

Tuesday, August 24, 2010

A Few New Kits!

It's been a very busy summer, which means there has been less time for dyeing kits!  I hope that I'll be able to get the stock back up in the Etsy shop this fall when the children go back school.  In the meanwhile, I've dyed up Golden Vanilla, Soft Pink and Pale Lilac.  I've got a Wedgewood Blue in the dye pot right now, too, and a Pale Iris going into the pot tomorrow morning.

Both the Golden Vanilla and Soft Pink have some pretty lace that I picked up in NYC last time I was there.  I only bought enough for two kits, and these are the ones.  I will definitely buy more of this lace - it dyed up nicely and some parts have a nice sheen, while other are more matte, making for an interesting lace.


The Wedgewood Blue and Pale Iris kits will have some new powernet that I got in that has a pattern.  I only bought a small amount, so this will only be in four kits that I dye.  This is how it looks in white, before dyeing, and should be interesting to work with for back bands and even overlays.


The Pale Lilac, sadly (for me, but good for you!), has a few small flaws that can be cut around:


This is a gorgeous color, but I'm going to have to offer this kit at a discount due to the flaws.  If you want this kit, it will be $10, plus $5 for Priority Shipping or $3.00 for 1st class shipping.  Please email me at summersetbanks "at" gmail "dot" com and we'll get everything set and the kit into the mail.

Thursday, July 1, 2010

Some Bigger Kits
I've dyed up a couple of bra/panty kit combos and put those in the shop since I haven't done those in a while.  That puts me out of stock on panty lace/elastic, but I can always get more!

First, a color I haven't done in a while, Mochachino.  Note that there are two different kinds of panty elastic for this kit:  standard elastic and a 1" wide stretch lace.  There is also a 36" x approx. 24" cut of the satin;  this is double the amount I'd put in a bra only kit.


There is one small flaw in the center of the satin yardage, but it is very small and easily cut around.  Just thought I'd let you know that up front.


Then there is a Super Kit - this one is really fun for mix and match opportunities.  This one is a black, white and fuchsia combo.  This kit has *almost* everything for 3 bras or for a bra/panty combo or maybe a few of each, depending on the size you're making.  The only things this kit does not come with fuchsia fabrics (I found some wide white stretch lace, but it isn't shown).  It *will* ship with 3 pair of wires.


Lastly, and not for sale in Etsy I do have some hand painted fabrics.  I'm not sure that I like them as well as I thought, but if you like them, I'd be happy to dye up matching elastics/findings to go with them.  The satin is muted compared to the powernet, and is a generous 36" x approx. 24" cut; twice what I put in the regular bra kits.  If you want this as a bra/panty kit, panty elastic will be on order (as will be a wire size or two I'm out of).


Email me if you'd like the painted fabrics or put together as a kit:  summersetbanks "at" gmail "dot" com.

One last thing, I will be unavailable to ship kits on Friday and Saturday.  Any kits ordered will be out first thing Monday or Tuesday (after I get your wire size!) or whenever the Post Office is accepting mail after the 4th of July holiday.

Tuesday, June 29, 2010

Four More New Kits!

I was able to get a few kits dyed up over the last few days and into the Etsy store.  There is Honey Gold and Light Desert Rose Pink:


Also available is Summer Sky Blue and Succulent Green/Silvery Blue:


A few words about the Succulent Green.  I haven't had much luck with this dye - it doesn't dye up the way I think it will.  This is the second time I've used it and I've had the same results both times - some of the fabrics take the blue component of the dye really well, but not the yellow so some parts are a blue tinge, while others are green.  It's not ugly, it's a rather lovely combination, and sometimes you get those unexpected things happen when dyeing!

Monday, June 28, 2010

A Few New Kits, One Discounted!

I am finally able to get back to dyeing kits after a long break due to end of school and vacation.  There is only one new kit on Etsy today, but I will adding kits during the week.  (If I get my supplies today, there will be new ones as early as tomorrow!).  Here's the first kit available, Pale Wedgewood, a lovely pale blue color:


Up for discount, at $10.00 for the kit and $5.00 for Priority shipping is a Pale Lilac.  The only flaw with the kit is some strange raspberry markings on the powernet, as seen below.  All the other pieces dyed fine and you could probably cut around the flaws, use the powernet under the lace or not at all.


If you'd like the Pale Lilac kit, please email me at summersetbanks "at" gmail "dot" com and we'll arrange for shipping. 

Thursday, April 1, 2010

New Colors!

The new kits colors are in the Etsy shop now!  I've got seven new colors and I think in the future I'll be able to get some lighter and darker variations of some of these new colors.

First, we have two new bright colors, Brilliant Blue and 80's Fuchsia. 

Yes, the fuchsia is just that bright, but either color will look great paired with the Just Black kit:


Next we have what was called Straw, but it looks more like Golden Vanilla to me.  Besides, Golden Vanilla sounds nicer than Straw.  As you can see, this color is lovely by itself or combined with Wedgewood Blue, Herb Green (HG has a slight blue tinge, too, makes for an interesting color) or Desert Rose.


BTW, the Wedgewood Blue kit has wider elastics for the bottom elastic (5/8" instead of 1/2") and for the straps (3/4" instead of 1/2"), plus the larger rings and sliders.

I've also dyed up a color I'm going to call Shell Pink.  This dye is actually labeled French Vanilla, but came out this pretty pale pink color.  This is actually the color I thought I was going to get with Lobster Bisque, so I'm glad I finally have a dye for this color.  As you can see it would combine well with either the Herb Green or the Desert Rose kits.  You can see that blue tinge to the Herb Green better in this photo.


This month sometime I plan to do some hand painted kits.  I've always wanted to try that, and I think it might make for some interesting final products.

Monday, March 29, 2010

Coming Soon!

New colors should be in the shop by the end of the week!  I've already dyed up three of the seven, but still need to dry, sort and fold the kits contents.

The new colors include:  Brilliant Blue (very bright!), Wedgewood Blue, Straw (renaming that one!), French Vanilla, Herb Green, Raspberry and Terracotta.

Saturday, March 27, 2010

Elan 530 - Tutorial - Part Four

Straps and Finishing


There are only three more things to finish before it is wearable: straps, wires and back closure.

Let's start with the wires. Insert the wires into the channels so that the white end of the wire is at the underarm and the end with the colored sparkles is at the center. In some cases, it will seem like the wire is a bit too long - do not worry, just shove it in. In the most careful way, of course. When you start to wear the final product the cups and channeling will stretch a bit and everything will fit just fine.

Once the wires are in, bar tack across the ends of the channeling on the bridge to close the channels. If this is only for a try on - you don't have to close the channeling. It will be just one less thing to rip out if you need to.  After closing the channeling, trim the excess channeling above the edge of the cup.

The next thing to make is the straps. The straps must be put on before the closure in this style. You will need to assemble the straps first. There are two options for straps with this pattern.  One type of strap is a partial elastic strap with the other part being made of the solid fabric.  The other type is a full elastic strap.  In either case, you will need to make elastic straps. This can be a bit tricky, but I hope this series of photos will help.

1. Thread the strapping through a slider leaving a tail about 3/4".


2. Stitch down the tail so that the slider can not come off.


3. Thread the free end of the strap through a ring.


4. Bring the free end of the strap around to the left, toward the slider.

5. Thread the free end of the strap through the slider again and pull tight.


That's it, the strap is ready to be attached.

If making full elastic straps, take the ring and insert that little bit of elastic that you left at the top of the cup through it, bringing the elastic to the back.

Bar tack the elastic in place. If this is only for a try on - just stitch across the elastic a few times, you can even leave the tails of the thread so you can find it and clip it out if necessary.

For the partial elastic straps, you will also need to make the fabric portion of the strap.  After interfacing the fabric sections, fold the strap piece right sides together the long way and stitch on the long curved side.  Turn the strap piece right side out and press.

The strap is attached to the front at the corner of the cup where the elastic stops.

Then attach the other end of the fabric strap to the elastic strap through the ring and stitch securely, bar tacking to make sure it is strong and secure.

For either strap version, the straps are attached to the back band the same way.  Bring the strap around to the back of the bra and line up the edge of the strap with the last unfinished edge of the back.
Zigzag close to the edge of strap to attach it, then bar tack at the elastic. This is a stress point, so it is a good idea to make it secure.


The final step is to add your closure. Check to see if the closure is the same width as the back. You might have to trim each section of the closure to fit. From the back, the hooks go on the section to your left. One end of the eyes opens up - just slip that over the raw edge of the back, with the fuzzy side (the side toward your body when wearing) down. The hooks go on the side to your right. Fold them in half, with the hooks facing down and attach like the eye section.

You can then either zigzag, satin stitch or baste it in place. If you're basting, use a regular stitch length. You don't want this coming loose during a try on!

You're done!  As a side note, this does look better on a body than on my dressform - my dressform is a little bigger than my daughter in the band, but smaller in cups!


Friday, March 26, 2010

Elan 530 - Tutorial - Part Three

Channeling and Upper Elastic

Once the bridge and back bands are applied, the channeling can be added. Fold the bridge and the cup so that they are right sides together with the cup.  The channeling is then applied with the seam of the channeling lined up with the two previous (bridge and band) seam lines. Make sure that the folded edge of the channeling is facing away from the cup and other fabrics at this point.

Make sure to stop stitching the channeling about 1/2" from the armhole edge so that the elastic will be easier to apply in the next step - the pin on the far left that is perpendicular to the channeling is my mark for stopping. You can trim away the channeling about 1/2" away from the armhole edge, too. 

Stitch the channeling in place along the seam line of the channeling.  When done and unpinned, it will look like this:


Fold the channeling to the inside of the cup and topstitch the folded edge of the channeling down.


To finish the top edge, 3/8" elastic is applied. This elastic is applied in the same way as the bottom elastic from the previous post, with two passes of zigzag stitching. Following the instructions, measure and cut the elastic (3/8" wide) to the 80% of the top edge measurement, plus 1" extra if using full elastic straps. Pin and sew as for the bottom elastic, except to optionally leave 1" of elastic extra above the top edge of the lace. This will be part of the strap attachment.

Almost done - all that is left is straps and finishing, which is the next tutorial!


Thursday, March 25, 2010

Elan 530 - Tutorial - Part Two

Bridge and Back Band


To prepare the bridge, fuse the interfacing to the wrong side of the bridge.  Fold the bridge, right sides together, and stitch the raw edges at the top together.

Turn the bridge right side out, and press.


With right sides together, stitch each diagonal edge to the cups, aligning the top of the bridge with the top of the cup. Bridge width can vary. If you have a bra that has a bridge with a good width for you, then trim the bridge to the same width before stitching. If not, just baste both sides so that you can adjust the width later.

 Stitch one side, and then stitch the other side of the bridge to the other cup.

To prepare the back bands for attachment, the bottom elastic will need to be sewn on. Cut a piece of elastic 80% of the measurement of the bottom of the back band. Place the elastic on the band with the plush side up on the right side of the band, and the straight edges together as shown below.  The elastic will be smaller than the back band, so you will need quarter mark both the elastic and the band and then pin the elastic to the band matching the marks.  To quarter mark, fold the item in half and mark the half way point.  Then, with the item still folded in half, fold it in half again and mark the two positions between the half way point and then ends. 


The elastic will be stitched on in two passes. First, stitch close to the loop edge with a small zigzag.  You will need to stretch the elastic as you sew it.  Be careful not to stretch the band, too, as your band will then be out of shape permanently.  This can be a bit tricky because the band is a stretchy fabric too!  Be patient and sew slowly, stretching from pin to pin.  This is what the stitching will look like:


Then turn the elastic to wrong side of the band and stitch with a zigzag close to the straight edge of the elastic.  You will be stitching with the wrong side of the fabric facing up. If you are basting this together for a try on, you can use a long straight stitch for the first pass, and a wide zigzag for the second pass.

This is what it looks like from the outside and inside:


Stitch the back bands to the cups, right sides together, aligning the marks and the top edge with the armhole edge of the cup.


Now we ready for the channeling and upper elastic, and you should have what looks like this:


Next Post:  Channeling and upper elastic!