
Elan 530 - Tutorial - Part Three
Channeling and Upper Elastic
Once the bridge and back bands are applied, the channeling can be added. Fold the bridge and the cup so that they are right sides together with the cup. The channeling is then applied with the seam of the channeling lined up with the two previous (bridge and band) seam lines. Make sure that the folded edge of the channeling is facing away from the cup and other fabrics at this point.

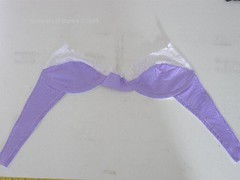
Stitch the channeling in place along the seam line of the channeling. When done and unpinned, it will look like this:

Fold the channeling to the inside of the cup and topstitch the folded edge of the channeling down.

To finish the top edge, 3/8" elastic is applied. This elastic is applied in the same way as the bottom elastic from the previous post, with two passes of zigzag stitching. Following the instructions, measure and cut the elastic (3/8" wide) to the 80% of the top edge measurement, plus 1" extra if using full elastic straps. Pin and sew as for the bottom elastic, except to optionally leave 1" of elastic extra above the top edge of the lace. This will be part of the strap attachment.


No comments:
Post a Comment