Friday, August 7, 2009

Basics

This post was orginially post on the Lingerie Sew Along blog, which is a private blog. The content was excellent, so I asked the original author, Tina of lingeriecrafter (do check out her blog - she makes some really lovely things!) if I could repost the information. She has graciously allowed me to post it here. I have added some information regarding supplies in blue type.

Bra terminology

To help our new members and also those who are not native English-speakers (I'm one too!) I thought I'd add a labeled bra diagram.

It took me ages to find a decent line drawing of a bra, but I finally got one from an Indian website. Unfortunately, the terminology there was different from what we use, so I'm just going to add labels here. (Please feel free to correct my usage, and I will make the necessary changes.)


This is a full-band bra with a three-piece cup. Note: A partial band bra will not have the band extending under the cups. There will smaller versions of piece #6, the bridge and #7, the wing that do not connect under the cups.

1. Bra strap attachment
2. Bra strap Straps can be made of bra strap elastic, which is usually plush on one side and shiny on the other - this is what I provide in the kits - usually the larger the size, the wider the strap. Non-stretch straps can be made from the same fabric as the bra for a little more support and no stretch. Straps also can be a combination of stretch/non-stretch so that there is a little give for wearing comfort.
3. Slider (for adjusting bra strap length) These come as pairs, and you'll need two sets for each bra. The ones in my kits are metal coated nylon, no plastic to possibly break, and of course the nylon will take dye.
4. Hook and eye closure Closures come in a variety of widths, but the main thing to note is that the larger the bra and wider the back band, the more hooks are needed. You can always trim down a back closure to a smaller number of hooks/eyes if you need to. The edges will not fray.
5. Bra cup. The number is exactly on the apex - the point furthest away from the body. Bra cups can be made from a variety of fabrics, but it best to follow the guidelines for the pattern you are using; some cups are stretch and some are not. The advantage of using a one way stretch fabric (like one-way stretch tricot) is that you can cut the sections that need stretch with the direction of stretch and those that do not in the direction in which there is no stretch. In general, larger cups sized pattern may not be drafted for stretch fabrics as a non-stretch or very low stretch cup will better support a larger figure.
6. Bridge This is the center section between the cups. It is almost always non-stretch. The bridge may be interfaced to give it strength. A small piece of fusible interfacing can be used, so if don't throw away little scraps!
7. Wing As noted below, some patterns have this piece combined with piece #9, so it might be cut with stretch. For larger sizes, this seam is an advantage because it is a place to add a small piece of boning for extra support.
8. Power bar or sling Not always used in all bras; nor will you find it in all patterns. This is an optional piece inside the cup which provides extra support, especially for the larger sizes.
9. Bra back This portion of the bra is usually cut with stretch and can be made of stretch fabric, powernet or other fabrics like lace or sheer with powernet underneath for support
10. Bra band elastic This elastic is plush on one side and smooth on the other. The plush side of course, makes wearing the bra comfortable. In general, larger size bras will use large widths of elastic. Since much of the support of a bra is in the band and cups (not straps!) then it makes sense to use elastic that is the correct size for the bra being made.
6+7+9+10 all together make up the bra band.
Many patterns have 7+9 as one piece.

The red line indicates the top edge of the bra, also called the neckline.
The blue line indicates where the underarm elastic is attached The underarm elastic, which continues on the back band toward the hook and eye closure is another plush back elastic, usually 3/8" in width, but for very large sizes, 1/2" might be more suitable.

I hope that this will help you if you are new to this type of sewing - it all seems a bit confusing at first because it is a whole new vocabulary and a whole new set of notions and fabrics. After a while, though, it gets easier, I promise.

Tuesday, August 4, 2009

A Good Question!

Lydia asked a good question yesterday:

"Are the plans for the pattern kits still in the cards within the next two months?"

Yes! I plan to have those kits ready by September 15th. Now, that is if everything goes according to plan, which seems very likely. I might even have them ready sooner!

P.S. Lydia - please email me regarding your second question. I can't seem to find an email address for you!

Monday, August 3, 2009

Shop is Reopened!

I am back from vacation and the Etsy shop has been reopened! I'll be continuing the Basics posts later this week.

Saturday, July 18, 2009

Vacation!

I will be on vacation for the next two weeks, and have decided to put the Etsy shop in vacation mode during that time. The shop will reopen Monday, Aug. 3. See you then!

Tuesday, July 14, 2009

Three More Bra/Panty Combos

Here are the latest bra/panty combo kits to go up on Etsy:

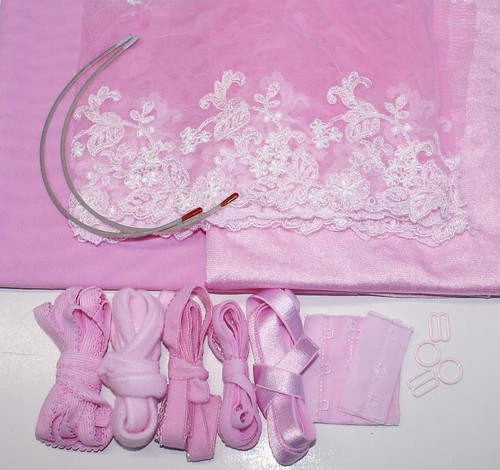
Carnation Pink - The children and I had an interesting discussion over exactly what shade of pink this is. While princess, baby and rose were suggested, we felt that carnation was the best description of the color.

Sea Breeze - This is a standard color, just in a larger sized kit. I realized I didn't have any kits of this color and I felt like dyeing this color today.

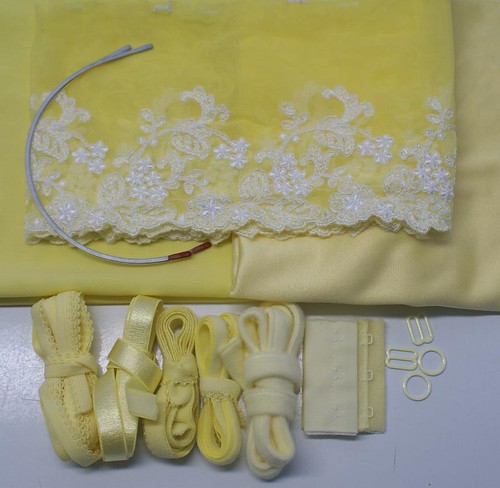
Lemon Meringue Yellow - This is a really pretty yellow - it reminds me of the yellow dress we saw Michelle Obama wearing recently. It also reminds me of lemon meringue pie - yum!

These kits are $25.00, not the $30.00 previously stated. I went back through the accounting and realized I had made a mistake, so we both win - my accounting is fixed and your kit is a bit cheaper!

These will be last kits made until after I get back from vacation in August. The store will remain open while I am on vacation and I will be shipping during that time.

Saturday, July 11, 2009

Edit: 7/14/09 - Pink Grapefruit Kit is Sold! Removing that content.

First Bra/Panty Combo Kits

There's Only a Few At This Point!


I have found a few sources for panty elastic and am waiting for a shipment. There are many styles of panty elastic, so the kits may contain different types. The three main types that will be in the kits would be the regular picot edge panty elastic, designed specifically for that application, foldover elastic which dyes really well, and 3/8" plush back loop edge elastic, which finishes the edges the same as the edges on a bra.

Meanwhile, there are some new large bra kits and bra/panty combo kits in the store. I did buy a small amount of yardage in NYC, and was able to make a couple bra/panty combo kits in Lilac and Pale Apple. They are up in the store now!

I've got one kit that I am going to offer here for sale at a discount price because of some mottling during the dye process. While it is not completely terrible, I prefer to get as close to a solid shade as possible when dyeing - things are always 100% perfect, but close. This kit is a bra/panty kit, with 3/4 yard of both fabrics, all in one piece. The mottling is not as bad on these pieces, but it still there. Note a few things about this kit: 1. the back hook only has two hooks, not three, 2. the panty elastic is white 3/8" loop edge plush back, not colored, it just isn't shown in the photo. This is kit is $20.00 (regular price is $30.00) , plus $5.00 shipping, again, first come, first served. I am willing to overdye this kit to make a color called Tropical Punch if you'd like, just let me know. The color will be similar to Pink Grapefruit, but darker.

Please email me at summersetbanks "at" gmail "dot" com if you'd like the kit and I'll email you an invoice through Paypal.

The really good news is that I know what the problem is and can now make the bra and panty kits up to my standards. There will be more kits in the future!

Friday, July 10, 2009

Basics

Sizes


Once you decide which pattern company you will purchase your pattern from, the next question is generally, "What size do I need to make?" Like RTW and patterns for sewing other garments, not everything is sized the same. Bra pattern sizes may be slightly different from company to company, so to start with you'll need your pattern instructions and some accurate measurements.

How do I measure?

All you need to measure is a reasonably well fitting bra (I realize some of you may not have a perfectly fitting bra, and that's why you're making one!) a flexible tape measure, a pen and something to write on. Measuring is best done with a helper - this doesn't have to be anyone experienced in sewing, their main purpose is to help you make sure that the tape measure is level and horizontal across your back when measuring, to help hold the tape measure and to write down numbers. Lacking a helper, you can use two mirrors to check the position of the tape measure in the back and a binder clip to hold that tape measure together in the front while you adjust the back.

What do I measure?

You'll only need two measurements to find your size. Each pattern company has its own set of directions for measuring and its own size charts, but they all follow the same general pattern. That pattern is to find the underbust measurement, which will help determine your band size and to find the overbust measurement and possibly the high bust measurement which will help determine cup size.

How do I measure the underbust?

While wearing your best fitting bra, loop the tape measure around yourself and measure around the body, underneath the bust making sure that the tape measure is level and horizontal across the back. Be sure that the tape measure is snug and not loose for this measurement. Do not exaggerate your posture or puff your chest out. The bottom band of the bra is a major player in the support system of the bra and you don't want a band that is too loose. If your pattern uses American sizes, jot this number down, and then follow the instructions in the pattern to find the band size. Usually you will add 4" or 5" to this measurement to come up with an even number. For example, if your under bust measurement is 33", you would add 5" to equal 38". This is the band size. By contrast, most European patterns do not do the the add 4" thing, your band size is the size you measure in cm.

How do I measure the overbust?

While wearing your best fitting bra, loop the tape measure around yourself and measure around the bust, across the fullest part of the bust, making sure the the tape measure is level and horizontal across the back. Do not pull the tape measure tight for this measurement. Measure comfortably, but not droopy loose, either. Write this number down. You will need this number to help determine cup size.

How do I determine cup size?

This measurement really is pattern specific and there are two or three general ways of doing this via American sized patterns - use the method in your pattern! Here are few ways to do this. One way is to subtract your band size from the overbust measurement and then determine the cup size from the difference; a difference of 1" equals an A, 2" equals a B, etc. For example, if your band measurement is 38" and your overbust measurement is 41" then you have a difference of 3" and your cup size is a C. Some patterns (like Kwik-Sew) will have you measure what is sometimes referred as the high bust measurement. This measurment is taken above the bustline, right at armpit level, with the measuring tape level and horizontal across the back, with a comfortable tension - not pulled tight. This high bust measurement is then subtracted from the overbust measurement and cup size is determined the same way; a difference of 1" is an A cup, etc.

Measuring is not hard, but it is essential to put you at the right starting point for fitting. If you can get a reasonably close fit, then it will take fewer adjustments to get you to a great fit. Like all sewn clothing, you have to have a starting point and fit from there. The measurements are only a tool to help you get the right fit.