Thursday, November 5, 2009

Elan 645 Tutorial - Part Two

Getting Ready, Sewing for Fitting, Cups


Once you have your pieces cut out, you are *almost* ready to begin sewing.

Before you begin, make sure you have the proper needle in your machine - one that will be able to sew stretch fabrics. This type of needle is different for every machine, but generally a stretch needle is the right one. You will be stitching a lot of elastic and stretch fabrics and the wrong needle will cause frustration every time. It is such a simple thing to fix, too!

The strange thing about bras is that unlike many other garments that can be fitted along the way, these garments can not. You just about have to have a completed garment before trying it on. Careful measurements help, but since every body is unique, you may have to adjust along the way. What I suggest doing, is doing what we do in regular garment sewing: baste! You can machine baste with a longer stitch before committing to permanently sewing the pieces together. You can also attach the elastics with a wide and long zigzag before making a commitment. It will be much easier to remove the stitching and adjust something rather than picking out little bitty stitches. Trust me, I've picked apart quite a few bras and it's no fun. As we progress, I'll show you both ways of stitching.

Cups:

To begin assembly, you will need to consider the top edge finish. If you are just using stretch lace for the upper cup, then you have no finishing to do. If you are using the stretch lace over another fabric, you will need to attach the two fabrics together. You can see the lace pinned in place below, and the notches marked in water soluble marking pen.
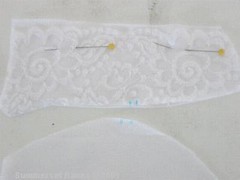

I use a small zigzag and stitch along the edge of the lace, following the curves.
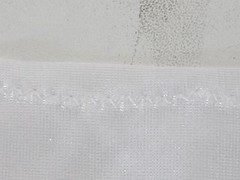
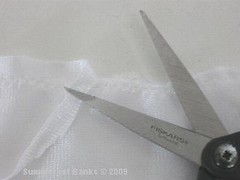
After stitching, I trim away the excess fabric from behind the lace.

Now, matching the symbols and notches, stitch the lower and upper cups together. I like to line the bottom cups - this is why I cut out four of them - which also helps to hide the seam allowances and make the inside of the cups smooth. To do so, I place the upper and lower cups right sides together and then place the remaining lower cup piece face down, right sides together *with the other lower cup*.

Don't be afraid to use a lot of pins. These fabrics can be slippery and your seam allowance is only 1/4". Make sure everything is lined up properly.
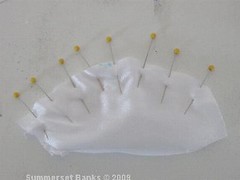
I stitch my seams with a 2.6 stitch length for a permanent seam. If you're basting, use something larger, like 4.0 length. This is big enough to be easily removed, but small enough to hold the pieces together properly. Once the seam is stitched, the cups can be opened and pressed.
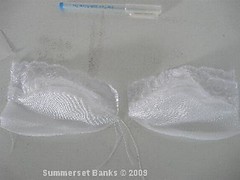


The cups are now ready for the next step: the bridge/bottom band. That's the next tutorial.

Monday, November 2, 2009

Elan 645 Tutorial - Part One

Trace and Cut


We'll be starting with the tutorial for Elan 645. Elan 645 has a full band, so much of what will be covered in the tutorial can apply to any similar pattern with a full band. The sample shown in this tutorial will be a 32A, probably cut down a bit when we get to the fitting process. My daughter needs new bras, I need samples for tutorials and you need a tutorial - we all win!

Once you have your pattern and have found your size - remember that I emailed you regarding wire size, which is the same as the pattern size - you'll need to find the correct sized pattern pieces. They are grouped by band size. For this pattern there are two options: one, a partially stretch band and stretch cups and two, a band that is stretch only in the back with non-stretch cups. Which option you chose will decide which pattern pieces you'll need for the band. For this tutorial, I am making the stretch cup version.

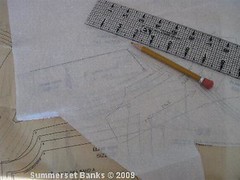
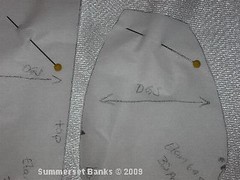
You will need to trace off the pattern pieces - do not cut them out of the tissue! You or whoever you are making this for may change in size and you might need those other sizes some day. The seam allowances are already included in the pattern pieces (hallelujah!), so all you have to do is trace. I just trace onto white tissue paper, the kind you'd use in gifts and gift bags. It is very easy to get and cheap. Make sure you mark all the dots, notches, direction of greatest stretch, and note the pattern number and size.


Once you have your pattern pieces, you can then cut out the fabric. To cut out the pieces, first check the pattern pieces for the greatest direction of stretch - this is similar to a grain line in a woven. Similarly, strange things happen if you don't follow the correct line - things will stretch that you don't want to stretch and stretchy parts won't stretch at all!

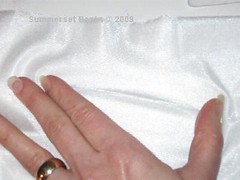
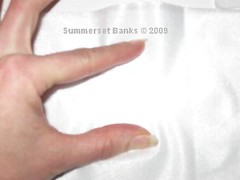
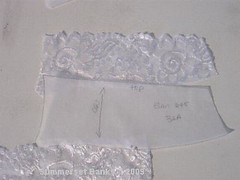
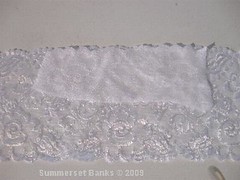
Now, find the direction of greatest stretch on the tricot. The tricot is a one way stretch fabric, meaning that it will stretch in one direction but not in the other. The power net is a 4 way stretch, meaning that it stretches in practically any direction. In the first photo, the fabric stretches in the horizontal direction, but not in the vertical as you see in the second photo.

Following the direction of greatest stretch or grain lines on the pattern pieces, pin and cut. You may prefer to rotary cut the pieces, that's fine. I actually prefer to use scissors - all the time, except for rectangular piece which are easier to cut with a rotary cutter. You'll rarely see those in this type of sewing anyway.


You can use the power net for the back bands, as you've probably seen in RTW. You can use it layered with the tricot for back bands and lower cups, and you can use it under lace for a little more stability. If you're making a smaller size, you might not need as much structure, but it can be a good idea for the larger sizes. Take a look at RTW, just to get an idea of what fabric they are using in what places.

As a general rule, I cut two of the upper cups of the lace and the two of either powernet or tricot depending on the strength of the lace and whether I want a little sheerness. I cut 4 of the lower cup, and I'll show you how I use those to line the lower cup and hid the seam allowance in another post. I cut two of the back band in either powernet or tricot and two of the bridge in tricot.

The last thing you'll need to cut is the lace. Place the upper edge of the pattern piece along the scalloped edge of the lace and cut out one side.


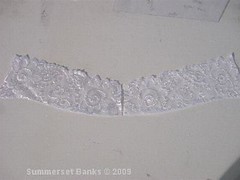
Flip the lace piece over to cut out the other side. Use the scalloped edge of the already cut edge to locate a repeat so that you get a mirror image.

If you have a double scalloped lace, like I'm using for the sample, sometimes the opposite edge has a better mirror image.

Once cut and placed side by side, you can see that the lace motifs form a mirror image starting at the center.


The next installment will be on Thursday, starting with a few words about machine set up and then getting to make the cups!

Tuesday, October 27, 2009

Elan #511

Elan #511 is different from #645 in that #511 is a partial band bra, while #645 is a full band bra. The fit is relatively the same, and again I've used some leftover supplies to make this bra.


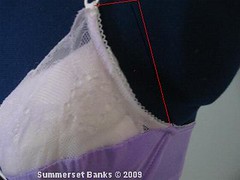
Overall, I'm very happy with the fit of this one too, and I'd only make one small change to the next one I make. I would add just a little more to the side of the upper cup for a little more coverage at the underarm. This one is fine and I'll wear it as it, but in the next version I'll fix that. I just need to angle that side up a little more from the point where the solid meets the lace and out about 1" or so from the top edge when I cut out the lace, as shown in the red lines below.

The pattern is well written and I only changed one little thing - I did not gather the center front of the bridge. I can only see one potential issue with the pattern and that is how wide to make the bridge. That, of course, is personal to whoever will be wearing the final product. The piece that you cut out is plenty wide for a variety of sizes, but you'll need to size it for yourself. I was fortunate enough to have the #645 to compare the width of the bridge, and just made it that length. If you have a bridge that fits properly, then you can cut this one to the right length without a bit of basting and trial/error. I'll discuss this more in the tutorial for this style when we get there.

Thursday, October 22, 2009

Elan #645

First Impressions in Black and White


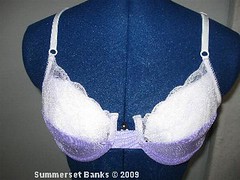
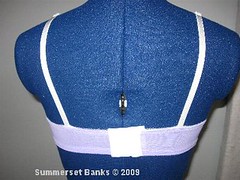
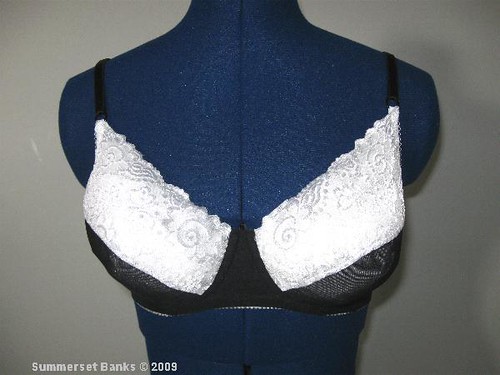
I've never used an Elan pattern, so I figured I should sew up the ones I have to check the instructions and fit so that the tutorials will be better. I started from scratch, retaking my measurements and ended up making a 34C, which I was hoping would fit, as some patterns I've sewn have been really close, good enough to wear, but not perfect. I was seriously surprised - this is the best fitting bra I've made by far!

I've used leftover fabrics and supplies from other projects, and was pleased with the outcome.


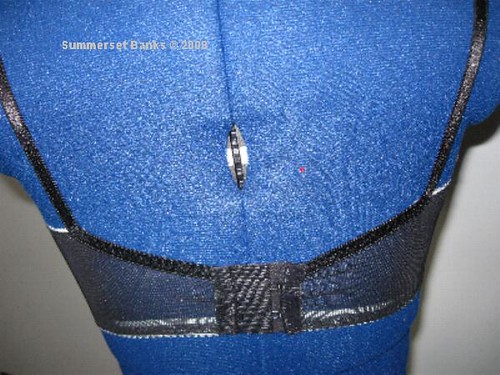
The fit is very good, with the band tight enough for good support and the bridge the right size so that it touches the chest wall like it should. The bridge is the part that isn't quite right on the other patterns I've tried. They've all been close and good enough, but not like this. You can see how close the channels are on the wrong side in the photo below:


I'm very pleased with this one and have high hopes for Elan #511. I will sewing up Elan #511 this weekend as a test so stay tuned for that one. After that I will sew up two more of each style so that I can document the step by step tutorials with extra tips.

Friday, August 7, 2009

Basics

This post was orginially post on the Lingerie Sew Along blog, which is a private blog. The content was excellent, so I asked the original author, Tina of lingeriecrafter (do check out her blog - she makes some really lovely things!) if I could repost the information. She has graciously allowed me to post it here. I have added some information regarding supplies in blue type.

Bra terminology

To help our new members and also those who are not native English-speakers (I'm one too!) I thought I'd add a labeled bra diagram.

It took me ages to find a decent line drawing of a bra, but I finally got one from an Indian website. Unfortunately, the terminology there was different from what we use, so I'm just going to add labels here. (Please feel free to correct my usage, and I will make the necessary changes.)


This is a full-band bra with a three-piece cup. Note: A partial band bra will not have the band extending under the cups. There will smaller versions of piece #6, the bridge and #7, the wing that do not connect under the cups.

1. Bra strap attachment
2. Bra strap Straps can be made of bra strap elastic, which is usually plush on one side and shiny on the other - this is what I provide in the kits - usually the larger the size, the wider the strap. Non-stretch straps can be made from the same fabric as the bra for a little more support and no stretch. Straps also can be a combination of stretch/non-stretch so that there is a little give for wearing comfort.
3. Slider (for adjusting bra strap length) These come as pairs, and you'll need two sets for each bra. The ones in my kits are metal coated nylon, no plastic to possibly break, and of course the nylon will take dye.
4. Hook and eye closure Closures come in a variety of widths, but the main thing to note is that the larger the bra and wider the back band, the more hooks are needed. You can always trim down a back closure to a smaller number of hooks/eyes if you need to. The edges will not fray.
5. Bra cup. The number is exactly on the apex - the point furthest away from the body. Bra cups can be made from a variety of fabrics, but it best to follow the guidelines for the pattern you are using; some cups are stretch and some are not. The advantage of using a one way stretch fabric (like one-way stretch tricot) is that you can cut the sections that need stretch with the direction of stretch and those that do not in the direction in which there is no stretch. In general, larger cups sized pattern may not be drafted for stretch fabrics as a non-stretch or very low stretch cup will better support a larger figure.
6. Bridge This is the center section between the cups. It is almost always non-stretch. The bridge may be interfaced to give it strength. A small piece of fusible interfacing can be used, so if don't throw away little scraps!
7. Wing As noted below, some patterns have this piece combined with piece #9, so it might be cut with stretch. For larger sizes, this seam is an advantage because it is a place to add a small piece of boning for extra support.
8. Power bar or sling Not always used in all bras; nor will you find it in all patterns. This is an optional piece inside the cup which provides extra support, especially for the larger sizes.
9. Bra back This portion of the bra is usually cut with stretch and can be made of stretch fabric, powernet or other fabrics like lace or sheer with powernet underneath for support
10. Bra band elastic This elastic is plush on one side and smooth on the other. The plush side of course, makes wearing the bra comfortable. In general, larger size bras will use large widths of elastic. Since much of the support of a bra is in the band and cups (not straps!) then it makes sense to use elastic that is the correct size for the bra being made.
6+7+9+10 all together make up the bra band.
Many patterns have 7+9 as one piece.

The red line indicates the top edge of the bra, also called the neckline.
The blue line indicates where the underarm elastic is attached The underarm elastic, which continues on the back band toward the hook and eye closure is another plush back elastic, usually 3/8" in width, but for very large sizes, 1/2" might be more suitable.

I hope that this will help you if you are new to this type of sewing - it all seems a bit confusing at first because it is a whole new vocabulary and a whole new set of notions and fabrics. After a while, though, it gets easier, I promise.

Tuesday, August 4, 2009

A Good Question!

Lydia asked a good question yesterday:

"Are the plans for the pattern kits still in the cards within the next two months?"

Yes! I plan to have those kits ready by September 15th. Now, that is if everything goes according to plan, which seems very likely. I might even have them ready sooner!

P.S. Lydia - please email me regarding your second question. I can't seem to find an email address for you!

Monday, August 3, 2009

Shop is Reopened!

I am back from vacation and the Etsy shop has been reopened! I'll be continuing the Basics posts later this week.